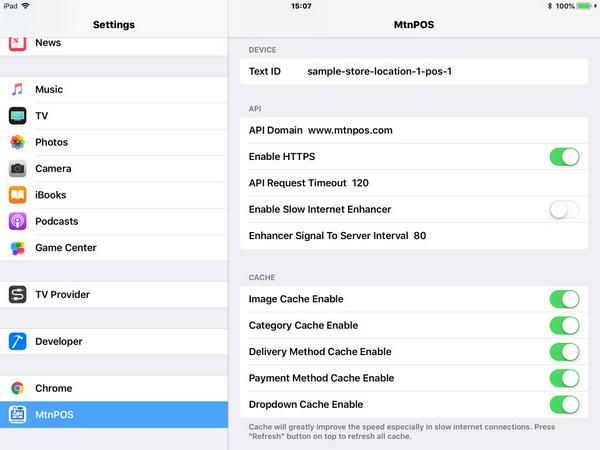
1. DEVICE
Text ID
This Text ID must be unique. It will be used to track orders and generate reports.
2. API
API Domain
This setting is crucial. The iPad APP will use it to load products from a correct store.
Enable HTTPS
Always enable it to have better security through Internet. If the MtnPOS server is running at isolated Local Area Network, it's not required to enable it. Disable it will have better performance.
API Request Timeout
The seconds for MtnPOS APP to establish a connection to the MtnPOS server. In a fast network connection, 15 seconds will be a good number. In a very slow mobile connection, 60~120 seconds are recommended.
Enable Slow Internet Enhancer
Enable it only at extremely slow network connections, e.g. Mobile Internet.
Enhancer Signal To Server Interval
Set as 60~80 seconds when enabling "Enable Slow Internet Enhancer". The MtnPOS APP will keep live connections to the MtnPOS server to increase performance greatly.
3. CACHE
Note: All cached items are saved into Memory (not disk) to have even better performance. The default cache time is 1 hour for all. To clean all cache, press the refresh Menu Button on top.
Image Cache Enable
Enable it to achieve better performance. If in a slow network connection, it's highly recommended to enable it.
Category Cache Enable
Enable to cache category list into Memory.
Delivery Method Cache Enable
Enable to cache delivey method list into Memory.
Payment Method Cache Enable
Enable to cache payment method list into Memory.
Dropdown Cache Enable
Enable to all dropdown list into Memory, e.g. country names.
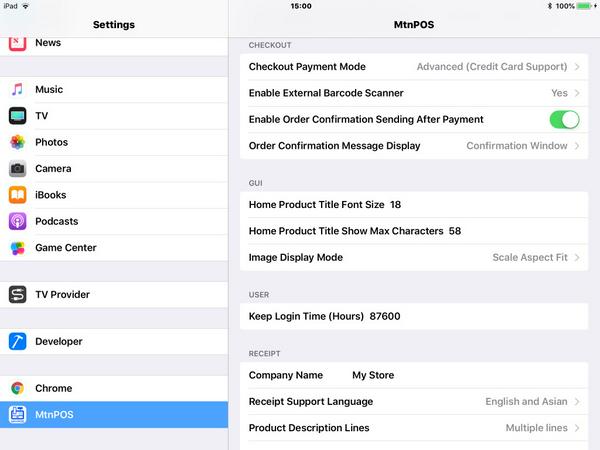
4. CHECKOUT
Checkout Payment Mode
- Simple (Cash Only)
- Advanced (Credit Card Support)
Enable External Barcode Scanner
Enable it to support advanced barcode scan. MtnPOS scanning smartly support UPC, Internal Self-generated Barcode, SKU, Product ID and Order ID.
UPC sample: 4011200296908
Internal barcode: ABCDEFG-1234
SKU: ABCD-EFG-1234
Product ID: P12345
Order ID: D12345
Enable Order Confirmation Sending After Payment
When enabled, a window will auto popup to ask a user to enter a email or a phone number to receive order confirmation after a order been placed successfully.
Order Confirmation Message Display
- Auto-hiding Notification (the message will auto hide after 3 seconds)
- Confirmation Window (it needs sales person to click to close it)
5. GUI
Home Product Title Font Size
Font size for a product title at home screen.
Home Product Title Show Max Characters
Max character number to show for a product title at home screen.
Image Display Mode
- Scale To Fill
- Scale Aspect Fit (Recommended)
- Scale Aspect Fill
6. USER
Keep Login Time (Hours)
Time to keep login for a MtnPOS staff person. Note: only a logged in staff can view order list, view reports and cancel orders with proper permission configured from backend.
7. RECEIPT
Company Name
This name appears on the top of the receipt.
Receipt Support Language
Current receipt printing supports both English and Asian languages well.
Product Description Lines
If product description is long, Multiple Lines option is prefered for English. Asian language default use Multiple Lines printing.
Print Copies After Ordering
How many receipt copies need to print after a order been placed. If no receipt printer is connected, it needs to set to 0.
Print User Info
Enable it to print customers' first and last name on a receipt.
Enable Signature
Enable it to print a signature line.
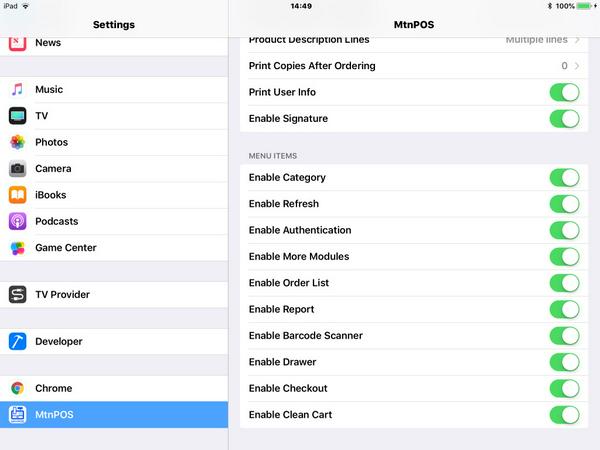
8. MENU ITEMS
Enable Category
Enable this option to filter products by category.
Enable Refresh
Click this button to refresh all data cache, reload home screen and reload top menu items.
Enable Authentication
This is used for staff login.
Enable More Modules
More modules will be in this dropdown.
Enable Order List
This is for direct order list view after login.
Enable Report
This is for direct report view after login.
Enable Barcode Scanner
This will enable advanced barcode scanning.
Enable Drawer
Click this button will open cash drawer. A POS enabled cash drawer must also connect to a receipt printer, which powers that drawer.
Enable Checkout
Click this to checkout and payment.
Enable Clean Cart
Click this to clean all cart items at once.